In this post we’ll install the WDL-OL library and its dependencies. We will then run one of the demo projects to make sure everything’s working fine.
Most of this is also covered in the videos by Oli Larkin:
The following section is Mac-specific. The guide for Windows is below.
Setup on Mac OS X using Xcode 4
Before we can get started, we have to download and install a few things. This part is a little laborious, but you only have to do it once.
Prerequisites
- If you don’t have Xcode installed, download and install it.
- Download the VST3 SDK. You will have to register for an account first.
- Download the Audio Tools for Xcode. In Xcode’s application menu, click Open Developer Tool → More Developer Tools… (or click here). Find Audio Tools for Xcode in the list, download and install it. There’s a different version for different OS X versions, make sure you get the right one.
- Download RtAudio (includes the ASIO SDK files we need).
- If you don’t have git, make sure you install it first. It’s worth it!
Downloading WDL-OL
Now open a Terminal. Type the following lines to create a new folder inside your home directory and go into it:
mkdir ~/plugin-development
cd !$
Let’s get WDL-OL:
git clone https://github.com/olilarkin/wdl-ol
cd wdl-ol
You may want to copy & paste the last line. Don’t forget the dot at the end! It ensures that you’re using the same version of WDL‑OL that’s used for these tutorials. You should have a new subfolder called wdl-ol.
Adding the Dependencies
Go into ASIO_SDK and copy the .cpp/.h files from RtAudio’s include folder here. Unzip the VST3 SDK, and copy the files aeffect.h and aeffectx.h from the folder pluginterfaces → vst2.x into WDL-OL’s VST_SDK subfolder. Apart from that, You only need the base/source, pluginterfaces and public.sdk/source folders for VST3. Copy them like this:
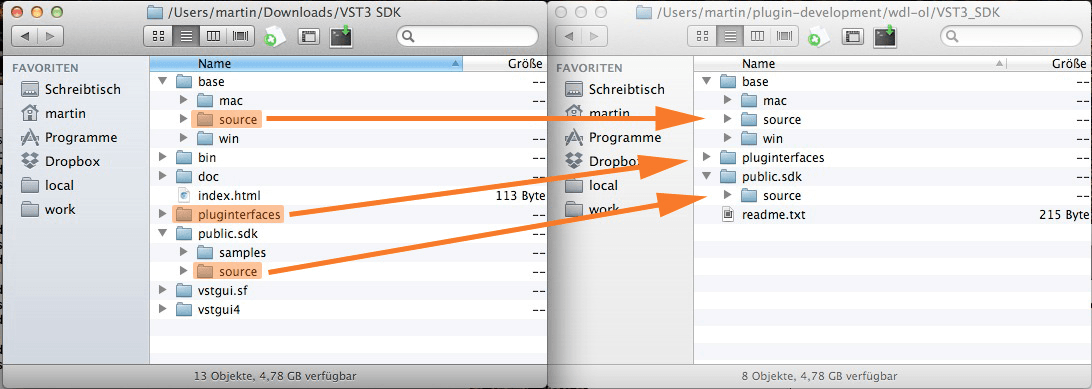
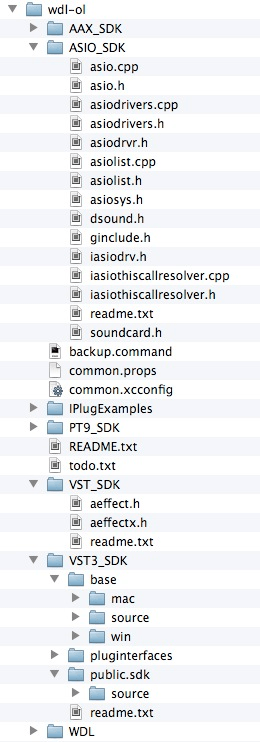
Note that you’ll have to create the public.sdk folder by hand. This is what your folder structure should look like:
Now open common.xcconfig (it should open in Xcode) and make the following changes:
CERTIFICATE_ID = Your Name

// Comment this line out:
// COMPILER = com.apple.compilers.gcc.4_2
// Uncomment this line:
COMPILER = com.apple.compilers.llvm.clang.1_0

// Add these lines:
VST_FOLDER = ~/Library/Audio/Plug-Ins/VST
VST3_FOLDER = ~/Library/Audio/Plug-Ins/VST3
AU_FOLDER = ~/Library/Audio/Plug-Ins/Components
// Comment these out:
//VST_FOLDER = /Library/Audio/Plug-Ins/VST
//VST3_FOLDER = /Library/Audio/Plug-Ins/VST3
//AU_FOLDER = /Library/Audio/Plug-Ins/Components
You can also see that we’re going to use Mac OS X 10.5 as both BASE_SDK and MACOSX_DEPLOYMENT_TARGET. Music producers and especially recording studios are often very lazy about updating their operating system: They don’t need any new features, but having the studio disfunctional for a few days due to updating problems could cause big losses.
Actually, the deployment target is the version your users will need, but I prefer to set the base SDK to the same version as well.
The 10.5 SDK isn’t included with Xcode 4. If you already have it installed, skip to Running the Example Project. If you don’t have it, read on:
Installing the 10.5 SDK
To get the 10.5 SDK, you need to download Xcode 3.2.6. Once you have it downloaded, mount the .dmg file, open Terminal.app and enter:
open /Volumes/Xcode\ and\ iOS\ SDK/Packages/
A Finder window will open and there will be a file called MacOSX10.5.pkg. Double-click it. If you’re using OS X 10.8 or later, it’ll show a message saying that it can’t install software from an unidentified developer. In that case, right-click the file, choose Open in the menu, and confirm that you really want to install the software. When installing, choose change install location and option-click on the drive you want to install to, so that you can specify a folder. Install it to the Downloads folder inside your user folder, for example.
After that’s done, you’ll have a new folder called MacOSX10.5.sdk in the location you selected. In Terminal.app, type:
open /Applications/Xcode.app/Contents/Developer/Platforms/MacOSX.platform/Developer/SDKs
Again, a Finder window will open. Drag the MacOSX10.5.sdk folder in there. After restarting Xcode, you should now have the old SDK available in Xcode 4. Make sure you keep the MacOSX10.5.pkg around somewhere: If you update Xcode to a newer version, you’ll probably have to do this step again.
If you have any problems installing the 10.5 SDK, please leave a comment and I’ll be happy to help.
Running the Example Project
Back in your terminal, go to the examples folder:
cd IPlugExamples
Run the duplicate script to create your first plugin (replace YourName with your name):
./duplicate.py IPlugEffect/ MyFirstPlugin YourName
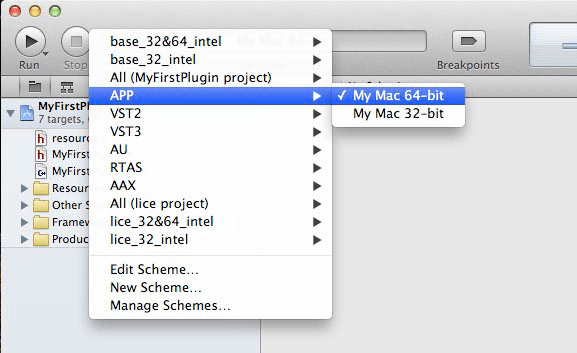
You will notice that there’s a new folder MyFirstPlugin. Go into it and open MyFirstPlugin.xcodeproj. Select the APP Target:
Now there’s a small bug in WDL-OL where the standalone app doesn’t output any sound unless you choose a different audio input. Fortunately that’s easy to fix: In Xcode’s project navigator, open Other Sources → OSX App Wrapper → app_main.h. Change line 34 (the one with #define DEFAULT_INPUT_DEV) to this:
#define DEFAULT_INPUT_DEV "Built-in Microphone"
Click Run. You will get a few linker errors:
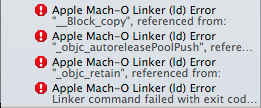
These are easy to fix. Go to your project’s build setting (make sure you select your project, not a specific target) and set the value for Implicitly Link Objective-C Runtime Support to No:
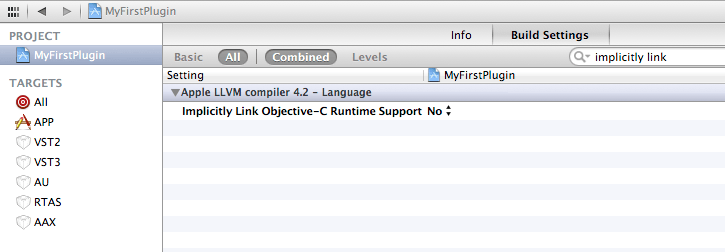
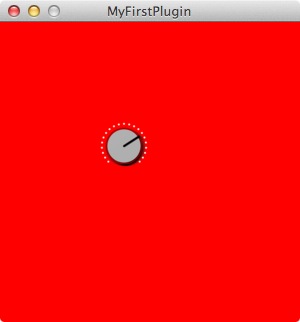
Click Run again. After a few seconds, you should see your first plugin run as a standalone app:
Validating the AudioUnit version without Logic
If you don’t own Logic, you can use Apple’s free auval tool to check whether your plugin’s AU version is working correctly. Make sure you’ve successfully built the AU target, open a Terminal and enter:
auval -a 2> /dev/null | grep MyFirstPlugin
It should output a line similar to this one:
aumu Abcd Efgh - YourName: MyFirstPlugin
If it doesn’t give any output, try this.
Troubleshooting
If Logic (or auval) doesn’t find the AU version (and other hosts like REAPER see it): Go into the Build Settings, and make sure that the AU target is selected in the upper left. Search for “active arch”, and the list should only show one entry: Build Active Architecture Only, which has the value: <Multiple Values>. Change that to No. This way, 32- and 64-Bit will be compiled even in Debug mode. After that, run Product → Clean (Cmd+Shift+K), build again and it should work.
Setup on Windows using Visual C++ 2010 Express
First, install Visual C++ 2010 Express. Visual Studio 2012 has been reported to work, but I can’t test it on my system. After that, install Git for Windows, using the default settings. I used version 1.8.4. Run Start → Program Files → Git → Git Bash. A terminal window will open. In that window, run the following commands:
cd c:
git clone https://github.com/olilarkin/wdl-ol
cd wdl-ol
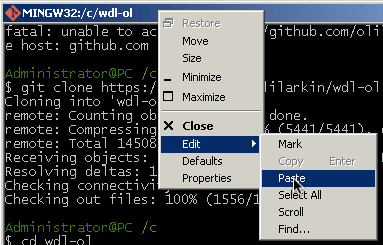
To paste into the window, right-click the title bar and chosse Edit → Paste:
Now copy all the VST2/VST3/ASIO SDK files into the right folders, as described above. Install Python using the default settings. I used version 2.7.5.
To be able to build VST3 plugins, we have to create the VST3 folder. Run this command in the terminal:
mkdir -p "C:\Program Files\Common Files\VST3"
Now (in the terminal), navigate to the IPlugExamples subfolder:
cd IPlugExamples/
Run the duplicate script using the Python you just installed:
/c/Python27/python.exe duplicate.py IPlugEffect MyFirstPlugin YourName
You’ll get a new folder MyFirstPlugin. Go into it and open MyFirstPlugin.sln. Ignore the warning, it just means that you can’t compile AAX and TDM formats. In the project explorer on the left, make sure MyFirstPlugin-app is shown bold:
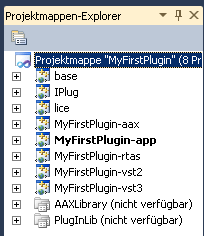
If it isn’t, right-click it and choose Set as StartUp Project. Now press the F5 key, and you should see a window like this:
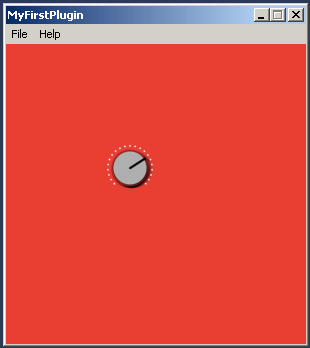
Lovely, right?
Troubleshooting
If you get a fatal error LNK1123 when building, you may have to disable incremental linking: Right-click the MyFirstPlugin-app project, click Properties and go to Configuration Properties → Linker (General) → Enable Incremental Linking → “No (/INCREMENTAL:NO)”.
If that doesn’t solve it, try installing Visual Studio 2010 SP1. You may also want the Compiler Update to get 64-Bit support.
If you get warnings that CreatePackage.bat […] exited with code 1, don’t worry about it (unless you want to build an AAX plugin). The warning just means that the AAX SDK isn’t there.
The warning Cannot open include file: ‘ForcedInclude.h’: No such file or directory means that the RTAS SDK wasn’t found. If you’re not trying to build RTAS, you can ignore this.
If you have any other problems, feel free to leave a comment! Next time we’ll examine the code.